Thursday, March 31, 2011

April Fools' Day Recipes

Any fun tricks up your sleeve for April Fools' Day tomorrow? Here are some tricky recipe ideas that are sure to FOOL your family and bring some fun to the day.

These fake-out desserts from the Food Network Magazine are sure to trick your loved ones and friends:


1. April Fools' Sushi (Rice Krispies Nuggets)
2. April Fools' Crab Cakes (Fried Ice Cream)
3. April Fools' Fries (Cinnamon-Sugar Sticks)
4. April Fools' Lasagna (Banana Pudding Cake)

This April Fools' Berry Soda Recipe from Taste of Home looks like a tasty berry beverage ready to be sipped. It's actually a tricky cup of gelatin so keep a spoon handy!


Taco Salad for dessert? Your little ones will love these tricky ice cream waffle bowls from Taste of Home once they realize you really ARE serving dessert.

Wednesday, March 30, 2011

{Party Inspiration} Easter Brunch

Need some FABULOUS Easter Brunch inspiration for this year's celebration? Beka and Kimberly of Philadelphia-based Styled put together three completely different Easter Brunch tables for an Easter shoot (photographed by Marie Labbancz) by mixing and matching just a few different elements. I love all of the results that they came up with!


Did you notice the "nest-like" chargers used on one of the tables? How about the strawberry containers to hold the little chick favors? Or the candy robbin's eggs as favors? I love all of the color combinations and the versatility of each element used. So many wonderful ideas! Thanks girls!

Tuesday, March 29, 2011

{Crafty Ideas} Pottery Barn Kids Inspired Easter Yard Sign

I always get so excited when a new Pottery Barn Kids catalog shows up in my mailbox. Not only do I love their products, but their catalog serves as a great resource for decorating inspiration and ideas. Their latest issue features all of their fabulous Easter decor. Among my favorites are these Easter Yard Signs:

So cute, right? I decided that these would be a great accessory for this year's Easter party that I am planning but I really didn't want to spend $49 on a yard sign. So, I decided to make my own.

Here's what you will need:

- 1 Painter's Canvas (I used an 8 x 10 just because that is what I had at home)
- Assorted Paint colors
- Paint brushes
- 1 Wooden Stake
- Staple Gun
- Assorted Stencils if desired

Instructions: Be creative and have fun! Let go of your fear of "messing" up. Unless you are artistically gifted in drawing/painting (I am NOT), it probably won't be "perfect". If you want perfect, pay $49 for the Pottery Barn Kids version. This would also be a fun craft for you kids to help out with.

- I began by painting the entire canvas light blue. I did coats, allowing each to dry about 15 minutes in between.
- I just painted everything by hand. If you want, you can purchase stencils to guide you and the end result may look a little less crafty ;)
- Once my sign was complete, I used a staple gun to attach the painted canvas to the wooden stake.


The entire project took me under 1 hour to complete and cost next to nothing (I think about $4 total!). These painted canvasas are great for birthday parties and other holidays as well. Be creative and have fun!

Sunday, March 27, 2011

National Capital Area Cake Show

Thanks to the hubby, I was able to have a girls morning out yesterday with a great friend at The National Capital Area Cake Show. This was my first time at the event and I really enjoyed seeing ALL of the amazing talent that is out there.

The event featured displays of cake and cupcake artwork, vendors, a bake sale, and ongoing demonstrations and classes by world-class sugar artist. There were also Live Cake and Cupcake Challenges that occurred later in the day. Maybe next year I will be able to catch those. I did participate in a hour-long cupcake decorating class with my friend, Mindy. We learned different icing techniques as well has how to work with fondant. Mindy already has mad cake/cupcake decorating skills. I, on the other hand, came away with a few great tips as well as a greater appreciation for the art of cake and cupcake decorating. I think that I will stick to event design! I came away from this event inspired by some pretty creative pieces (and feeling refreshed from a girls morning out!). Here are a few of my favorites: How cute are these Apple Basket CUPCAKES. Yep, they are cupcakes. I know...amazing. Scrabble, anyone? The detail was amazing on this cake. This masterpiece was created using Edible Image decorations. I was not familiar with this type of product prior to the event and was amazed at the endless possibilities that it offers decorators. L-O-V-E this silhouette cake! If I recall correctly, a Silhouette Machine was used to create the images on this cake. How cute would this be for a birthday party! *I wish that I was able to give credit to the artist that created the cakes/cupcakes above. Since they were on display for the challenges, they were numbered and not labeled with specific vendor/artist information.*

Saturday, March 26, 2011

{Real Parties} Modern Mindy

Today I am sharing two Real Parties that were submited to me by Mindy of Modern Mindy. The first party is a Sweet Strawberry Party that Mindy put together to celebrate her daughter's 3rd birthday. Mindy's inspiration came from the cute strawberry printables from Dimple Prints. I love all of the bright, cheerful colors that Mindy used throughout the party's decor as well as her attention to detail. How cute it that strawberry table skirt!

Photobucket

The cake (SO cute!) was created by a local decorator, Debbie Eaton.

Photobucket
Photobucket

The second party that Mindy sent over was A Tropical Tea. Every year Mindy's local MOPS (mother's of preschoolers) has a tea for 120 women. This year, insted of the usual "high tea", they decided to have a "tropical tea". With a budget of only $200, Mindy and her team of fellow moms were able to create a tropical oasis in a church gym. WOW! Here is how Mindy did it: "For the centerpieces I collected large cans & we wrapped them in orange & striped wrapping paper. In one we used a variety of tropical greens to create a relatively tall arrangement. We also incorporated the table signs into them. For the other centerpiece, I came up with a new twist on the tissue paper pom. We attached them to tall dowel rods giving a wonderful burst of color! We also had a "center table" were we used a very tall tropical plant to add even more drama. For the center stage area we started with a back drop of orange paper. We created a banner with colorful scrapbook paper & created the tropical tea letters with a Cricut. We flanked this with 2 large palm trees. We used discarded carpet rolls & wrapped them in butcher paper & rested that on umbrella stands to allow the stand up. We then drilled holes in the top & shoved large tropical leave in & fanned them out. We also hung paper lanterns from fishing line that we strung from basketball hoops. The food was fantastic with tons of tropical flavor. Fruit salsa with cinnamon pita chips, keylime pie, coconut dessert, macadamia cookies, curry chicken salad wraps, fruit skewers with creamy fruit dip, cucumber sandwiches, & lots more. Of course we had tropical tea plus a coconut pineapple ice cream punch!". I am amazed at how much these women were able to do on such a modest budget.

Photobucket
Photobucket

Way to go, Mindy! Thank you for sharing BOTH of your Real Parties with Sheek Shindigs. To see more of Mindy's creations, visit her at Modern Mindy.

Thursday, March 24, 2011

{Crafty Ideas} A Little Easter Fun!

If you weren't already in the mood to start bringing out those little bunnies and baskets, you will be after you see the recently featured Easter Craft Ideas from Country Living. I am especially fond of these two:

Play it by Ear: To stitch up one of these kid-friendly accessories, you’ll need a child-size headband ($3.99; drugstore.com) and 11⁄2 yards of 1⁄2-inch-wide double- fold bias tape. (For a range of prints, from $9.50 for three yards, visit etsy.com/shop/pollydangernotions.)


1: Cut an 181⁄2- inch-long piece of bias tape. Hem the cut ends under 1⁄2 inch on each side, then stitch together the long side to form a casing. Fold the casing in half so that the ends touch and use a straight pin to mark the fold’s center.

2: Feed an extra-thick, 12-inch-long pipe cleaner through one end of the casing, stopping at the pin. Feed a second pipe cleaner through the casing’s other end until it, too, meets the pin; remove pin. Bring the casing’s open ends toward each other and twist the exposed pipe cleaners together to form a rabbit ear shape. Repeat steps one and two to make a second ear.

3: Cut a piece of bias tape the length of the headband, plus one extra inch. Wrap the tape over the headband, then use pins to mark the two spots where you want to attach the ears (use the photo at left for guidance).

4: Remove the tape from the headband and stitch the long side together, from the pins out to both ends of the tape; stitch these ends closed, and remove pins. Twist the ears’ pipe-cleaner ends around the headband in the desired spots, then slide each end of the headband into the casing. Use a needle and thread to slip-stitch the tape around and between the ears closed.

Feather your nest with papier-mâché: Take a page from the grade-school activity book with these delicate candy dishes, made using shredded brown lunch bags and sheets from an old dictionary.


1. Tightly cover a small bowl with plastic wrap, then flip the bowl upside down on wax paper. In another container, mix equal parts water and clear glue.

2. Dip handfuls of shredded paper into the glue mixture, then immediately lay them on the bowl until it’s covered.

3. Lightly press dry paper strips along the outside to create a “nesty” look.

4. Let dry for 12 hours; carefully pull the wrap off the bowl and away from the nest.


Visit Country Living to view these craft ideas and others as well.

And the winner is...

This week's random Giveaway winner sponsored by CupKate's Event Design is Amanda of Shindigs. Congratulations!

Thank you to everyone that participated in this week's giveaway. I look forward to the next!

Wednesday, March 23, 2011

{Party Inspiration} A Mexican-Inspired Bridal Shower

One of my dearest friends is preparing to give her youngest sister a bridal shower and asked me to put together some ideas. Since the wedding is being held in Mexico, the shower's theme and decor is going to be Mexican-Inspired. Here is the inspiration board that I created:

The shower is going to be casual and FUN. So, I suggested that they incorporate lots of vibrant colors into the party decor through the use of flowers, table linens, and fun decorations (maybe a sombrero on each table, Mexican-inspired flags/banners, lanterns, etc.). I also suggested adding tea lights on the tables for a touch of elegance and sending guests home with a jar of Mexican wedding cookies.

Now I want to throw a little fiesta of my own! Who's in?

Image credits from left to right: (1 & 11: The Tea Room, 2 & 6: Social Couture, 5 & 12: Aymujer, 3: Good House Keeping, 2 & 13: The Little Things)

Tuesday, March 22, 2011

Celebrate Spring!

Spring is officially here. Hooray! Here are some fun ideas to help celebrate the new season and spread a little sunshine around.

Floral Cones: Paper cones can be great for popcorn and candy, but what about flowers! Make a stunning display at your next soiree by tucking assorted colors of your favorite springtime flowers (Cymbidium orchids are shown here by Martha Stewart) into handmade paper cones, then affix by ribbon to a board covered in pink linen to create a garden of floral favors. Each blossom is anchored in a tiny vial of water.


Daffodil Candy Cups: I love this idea from Martha Stewart. These would be great for an Easter celebration or spring-themed birthday party. And, they are really easy to make. Simply print the provided daffodil template, trace onto decorative paper, and cut out. next, fill baking cups with candy and place onto flowers. If desired, join cups to flowers with tape.


A Lavender & Lemon Cake: Bake and serve a slice of this Lavender & Lemon Cake by Rosie of Sweetapolita (one of my new favorite blogs to follow!) to your guests and warmer weather is sure to be on their minds.


A Surprising Fruit Centerpiece: Real Simple offers this fun and unexpected idea to turn fruit into a festive centerpiece! So spring-like, don't you think? Click here for the details.


A Garden To Go: A cluster of potted flowers can do double-duty at your next shindig. Grouped together, they make a gorgeous centerpiece for your table. When the party is over, let your guest pick one to take home as a favor and plant in their garden for the upcoming season.

Monday, March 21, 2011

{What's Cooking?} Banana Split Ice Cream Sandwiches

Y-U-M-M-Y! These Banana Split Ice Cream Sandwiches take a little planning-ahead prep work but are totally worth it. They look great and taste even better!


Banana Split Ice Cream Sandwiches

Ingredients:

Cookies:
7 tablespoons powdered sugar
6 tablespoons sifted all-purpose flour
1/4 teaspoon vanilla extract
1 large egg
Filling:
2 cups vanilla low-fat ice cream, softened
3/4 cup ripe mashed banana (about 1 1/2 medium bananas)
6 tablespoons coarsely chopped dry-roasted peanuts, divided
Remaining ingredients:
6 tablespoons frozen fat-free whipped topping, thawed
6 tablespoons chocolate syrup
6 maraschino cherries, drained

Preparation:
To prepare cookies, combine sugar and flour, stirring with a whisk. Add vanilla and egg, and beat with a mixer at medium speed 2 minutes. Cover and refrigerate 2 hours.

Preheat oven to 350°.

Cover a large baking sheet with parchment paper. Draw 6 (3-inch) circles on paper. Turn paper over, and secure with masking tape. Spoon about 1 tablespoon batter into center of each drawn circle; spread batter to outside edge of each circle. Bake at 350° for 6 minutes or until edges begin to brown. Carefully remove cookies from paper, and cool completely on wire racks. Repeat procedure with the remaining batter, reusing the parchment paper.

To prepare the filling, combine the ice cream, banana, and 1/4 cup peanuts, stirring well.

Place 1 cookie on each of 6 plates. Carefully spread about 1/3 cup ice cream mixture over flat side of each cookie. Top with remaining cookies, flat sides down, pressing gently. Top each sandwich with 1 tablespoon whipped topping, 1 tablespoon chocolate syrup, 1 teaspoon peanuts, and 1 cherry. Serve immediately.

Nutritional Information
Calories:310 (20% from fat)
Fat:7g (sat 1.6g,mono 2.3g,poly 1.6g)
Protein:6.9g
Carbohydrate:55.9g
Fiber:2.3g
Cholesterol:39mg
Iron:0.8mg
Sodium:54mg
Calcium:79mg

* Recipe and picture taken from Cooking Light

Saturday, March 19, 2011

{DIY} Pom Pom Backdrop Tutorial

I have had many requests for a tutorial on how to make Pom Pom Backdrops. They are super easy, very inexpensive, and so versatile. These can be used as a backdrop for a dessert table, art on the wall to add to your parties decor, or as a "photo booth" backdrop.


To create, you will need:
  • 1 large piece of foam board or several smaller pieces of foam board, depending on what size you want the backdrop to be
  • Tissue paper, in assorted colors of your choice
  • Floral wire
  • Hot glue gun
  • Scissors

If you are using several pieces of foam board, begin by taping your foam board pieces together to create the overall backdrop size that you want. I suggest using a heavy tape, such as duck tape or packaging tape. Simply run tape along the seams of two pieces of foam board (on the backside).

Now you are ready to start making your tissue paper pom poms. Martha Stewart provides an excellent tutorial on how to do this, which I have provided below. (Pictures from Martha Stewart).


Step 1
Stack eight 20-by-30-inch sheets of tissue. Make 1 1/2-inch-wide accordion folds, creasing with each fold.

Step 2
Fold an 18-inch piece of floral wire in half, and slip over center of folded tissue; twist. With scissors, trim ends of tissue into rounded or pointy shapes.

Step 3
Separate layers, pulling away from center one at a time.

Now that your pom poms are made, begin gluing rows of pom poms onto your foam board backdrop using a hot glue gun. I suggest laying the board flat during this process and applying the glue at the center of the pom pom, where the wire has been wrapped. I chose to alternate colors but your backdrop design is only limited by your imagination. Have fun!

Thursday, March 17, 2011

For Japan With Love

This Friday Sheek Shindigs will be participating in the For Japan With Love Bloggers Day of Silence {no postings} to acknowledge and help raise awareness and respect for the devastation going on in Japan, as well as to help raise money for relief aid to Japan. Please stop by the For Japan With Love site and contribute if you are able to do so. Every little bit helps!

“All of the donations {For Japan, With Love} will go to ShelterBox, which provides emergency shelter and lifesaving supplies for families around the world who are affected by disasters at the time when they need it the most. Each large, green ShelterBox is tailored to a disaster but typically contains a disaster relief tent for an extended family, blankets, water storage and purification equipment, cooking utensils, a stove, a basic tool kit, a children’s activity pack and other vital items.”

Photobucket

Thank you for your support!

Wednesday, March 16, 2011

A Cupcake Shooters Container Giveaway!

A few weekends ago I had the privelege of getting together with a group of amazingly talented women that are local to the Northern VA, DC, MD area. It was a lunch date filled with inspiration, motivation, and information, not to mention GREAT company! One of these fabulous women was Kate of CupKate's Event Design. I liked Kate from the beginning, but I LOVED Kate after she introduced me to a fabulous new cupcake concept: Cupcake Shooters! I am not sure where I was when these popped up, but I am so glad that I know about them now. Thanks Kate!


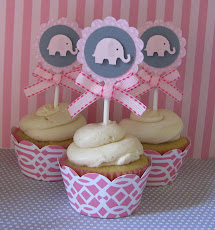
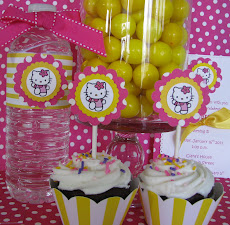
Aren't these a brillant idea! What a fun twist on the traditional cupcake for your next Shindig. They could be the main dessert attraction or stand on the sidelines as a fabulous party favor. My own kids tried them out and gave rave reviews. They loved the "fun" factor and I loved the fact that they eliminated the usual crumbly, icing- covered mess that a "normal" cupcake leaves in our house. Major bonus! In addition to offering amazing full party design, custom dessert tables and online event consultation, CupKate's Event Design is now selling push-pop containers over at Etsy. Now you can make your own Cupcake Shooters for your next Shindig!


CupKate's Event Design is this week's Giveaway sponsor and will be awarding one lucky follower with 2 dozen push-pop containers! Here's how you can ENTER TO WIN:

Become a follower of Sheek Shindigs (if you aren't already) and ...

1. Become a follower of the CupKate's Event Design blog, here, and leave a comment that you did so.
2. "Like" Sheek Shindigs on Facebook and leave a comment that you did so.
3. "Like" CupKate's Event Design on Facebook and leave a comment that you did so.
4. Post a link to this Giveaway on your Facebook page and leave a comment that you did so.

This giveaway will be open to entries from now (March 16th ) until Wednesday, March 23rd at 11:59 pm. You must be a Sheek Shindigs follower (or become one) to be elegible to win. Each person may enter up to 4 seperate times. A random winner will be chosen and announced on Thursday, March 24th. So...go check out these fun push-pop containers at the CupKate's Event Design Etsy shop and enter to win!

Good Luck!

Tuesday, March 15, 2011

We're on a Leprechaun Hunt!

I am a sucker for family traditions. Our family has never had one for St. Patrick's Day, so I decided to come up with one to start this year. On Monday night, a little "leprechaun" snuck into our house while everyone was asleep and paid our kitchen a friendly visit. In addition to some crumbs and open wrappers from the food that he helped himself to, we discovered a few footprints on the kitchen table as well (Since our kitchen tabletop is tile, I just used washable markers to make the footprints. You could re-create "evidence" of your own by leaving a green note, footprints across a newspaper, green glitter...).


After close inspection of the evidence left behind and a little "hunt", we decided to make a Leprechaun Trap (a friendly one, of course!).


The first step was deciding on how to build our trap. I found instructions on how to make a box out of popsicle sticks at kaboose.com and decided that, with a few adjustments, it would be perfect for trapping a little leprechaun. We glued our trap together using larger popsicle sticks. This project was surprisingly easy with the help of my glue gun.


My 4 year old then decided that we needed to diguise our trap as a rainbow. Pretty clever, I thought. This was definitely his favorite part of our project.


We gathered some "gold" coins from our play kitchen and decided to make a path leading the leprechaun into our trap. We will have to wait and see what we turn up with in the morning...

{Party Inspiration} An Ice Cream Party

Everyone loves an Ice Cream Party and with the help of One Charming Party, yours will be the talk of the town! Sara and Brittany of One Charming Party put together some delicious Ice Cream Party photos, ideas, and free downloadable printables to get you started. Check them out:

Invitations: Set the stage for a fabulous party with these yummy Ice Cream Party invitations. You can get the free download, here.


Set-up Suggestions: Ice cream is the star of this party. One Charming Party suggests that you set up an ice cream bar with cute cups, a variety of flavors and an assortment of toppings so guests can make their own sundaes. Then give them a spoon and let them dig in!


A Sweet Treat for the Birthday Girl: Everyone deserves to feel special on their brithday and how could you not with such a cool birthday hat! One Charming Party provides step-by-step directions on how to make this sweet Ice Cream Cone Party Hat, here.


Stay Cool: Even an ice cream party deserves a cool cake. Take a simple ice cream cake and top it with chocolate ganache. Add a chocolate ice cream cone to the top to make it look like melted ice cream. Don’t forget the sprinkles.


Party Favors: After the party is over, send your guests home with a party favor in an empty ice cream container. Print out One Charming Party's labels onto adhesive backed paper and cut out. Fill the container with anything you’d like and tie it up with a pretty ribbon and a pink spoon. You can download the labels, here.


Best ice cream party ideas ever! Thank you for the amazing ideas and inspiration, Sara and Brittany.